Construction site surveillance
I am building a house, for which I decided I need a surveilance cameras. I have never set up a security camera, so have zero knowledge before starting. Here are the prelminary requirements before I started:
- 24/7 on-demand live view, plus some recording: 7 days 24/7, plus some time for when and around “motion” is detected.
- Nothing that has a subscription fee. ring.com is pretty good for short-term plug&play, but I cannot brace myself for a yearly payment, especially that I have (and can afford to maintain and upgrade) storage, network and compute. Network subscription is a fine service to pay for, SaaS is not.
- Use off-the-shelf hardware, so I am only minimally required to maintain the setup (so no DYI webcams or routers).
This post highlights some things I wish I knew before buying & setting it all up.
The Components
Since the building site is “remote” (there is no existing infrastructure besides electricity), networking needs to be self-contained. This is the setup:
           o-
          /\
        Camera
          |
    LTE/5G Router
          |
   <public internet>
          |
         NVR
- Camera is the single most important component. Easy to understand what it is and why it matters.
- One can easily “live view” directly in the camera stream. Cameras can usually record video into a builtin SD card. However, that’s not very useful if it gets vandalized or stolen, so better continuously push that video somewhere safe.
- NVR is a Network Video Recorder. Besides the camera, this is the second most important component. NVR captures a video stream from the camera, (optionally) detects people and vehicles, and records everything. Since NVR is the main “interface” to the surveillance system, not the camera, it is important NVR has a good UX. You don’t care about the camera UX after it’s set up.
Video codecs
There are two codec choices, mostly:
- H.264 is a royalty-free video codec from 2003. According to a reference I found in Wikipedia, it was used by 91% of video industry developers as of September 2019. Every screen-equipped device that I tried can play it.
- H.265 (a.k.a. HEVC) is a royalty- and patent-ridden codec which offers 25-50% better compression ratios than H.264. In my experience, the compression ratio was over 50% better than H.264. It is amazing for transfer, un-playable on everything I’ve tried except Google Chrome browser on Android1.
- AV1 seems to be anecdotally on-par with H.265 and is not patent-ridden.
Camera cannot stream it, but lack of patent problems implies, it should be
good for recordings. However:
- I was not able to (easily) setup go2rtc with AV1.
- The 5-minute experiments yielded similar bitrates for similar quality. In the end, I decided it’s not worth the hassle until go2rtc offers a packaged configuration for it.
- H.264+, H.264B, H.264H and similar. They are “close” derivatives of H.264. Software support is hit-or-miss, so I mostly ignore those.
Picking the camera
A friend of a friend, who has been setting up security cameras for the last 15 years, recommended Dahua. I picked a model and went into it.
There are a few variables you may want to check:
- Pan, Tilt, Zoom (PTZ). Some cameras can change the viewing position
remotely. I picked one with PTZ, but more out of curiosity than necessity.
Turns out, ONVIF (the “open” protocol to control PTZ cameras) is very poorly
supported, or not at all, with the NVRs I’ve tried.
- Later edit: PTZ is great during construction. I can zoom into a road if I am expecting transport (and want to check, say, if it is not destroying everything around), I can zoom into a particular area of the house if I want to. Great choice for the first camera. Probably not for the second one — it will get boring with time.
- Resolution versus visibility in low light. ipcamtalk.com has decent recommendations, start there.
- Do your research in the website, there are some great tips. I wish I had known about it, or at least read the Dahua part, before purchasing mine.
Note that most cameras are designed and manufactured in China. Which, unsurprisingly, have bad reputation in the Chinese-controlled areas.
Network Video Recorder
Once you’ve settled on the camera (and the number of cameras), there are mostly two options for an NVR:
- A dedicated set-top-box-sized device from the camera manufacturer. These are completely hands-off in terms of maintenance. A hard drive is usually purchased separately, depending on how much should be recorded. The UX experience is “it is what it is”. I.e. camera manufacturers may or may not be the best NVR UX designers, especially when it comes to viewing the recordings or live stream remotely. However, they will for sure create the best Camera ⇔ NVR integration. Most hassle-free, least control.
- Open source NVRs, which you can install to your existing home server. I considered frigate, Moonfire NVR and ZoneMinder. Since I use a home server, I am self-hosting my NVR.
Moonfire NVR
Moonfire NVR seems like the simplest of the bunch: low hardware requirements (raspberry pi 2!), minimal number of features. Cons: does not have object detection, not even “in theory”. I have relatively powerful hardware in the closet and want object detection for it.
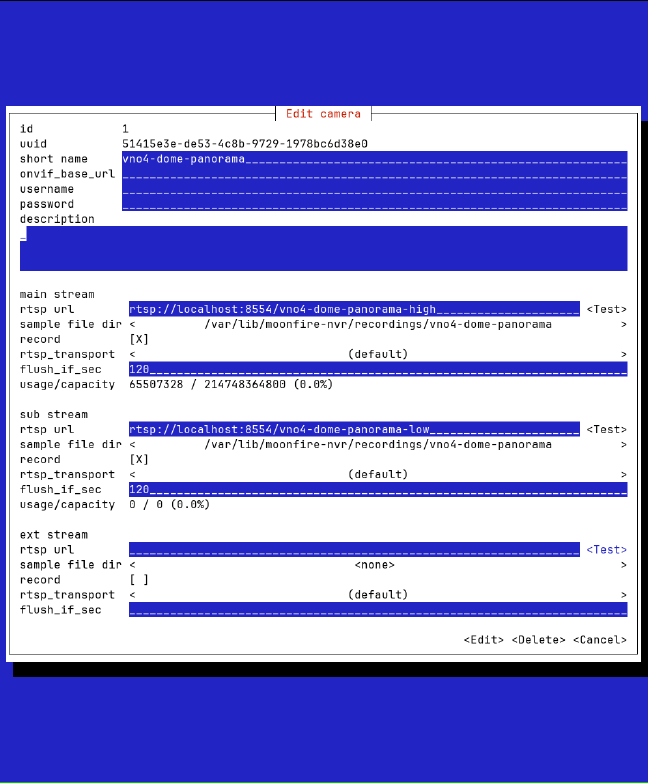
Moonfire NVR’s interface is ncurses-based, similar to how Linux kernel is configured. In my opinion, for end-user product, one either offers file-based configuration, or web-based configuration directly in the browser. Many projects do both (e.g. home-assistant, frigate). This is the first ncurses-based configuration for a consumer product. Which makes me wonder what their audience is.

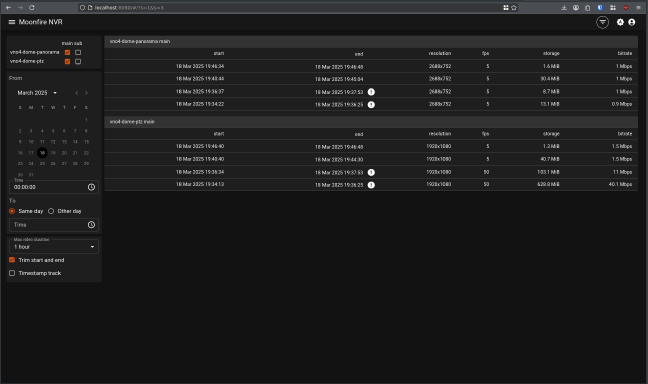
Once configured, the recordings are listed as a timestamped list. Which is good if you know the time upfront, but is not great for discovery.

I didn’t go with Moonfire, because it is does not offer a good UX for discovering videos, and I much prefer file-based configuration.
Setting up Frigate
Frigate seems to be what the kids use these days. Documentation is extensive, though sometimes not very accurate, but their forums compensate for it. It took a few evenings to get it to work, and it works.
A few tips before you get started:
- For object detection you will need hardware support. Look at recommended hardware. I went with Google Coral, but I’ve heard good things about OpenVINO too.
- Start with go2rtc from the get-go. I had to re-configure all the Frigate streams, which was way more annoying than it’s worth if you start with go2rtc. Saved a lot of bandwidth, too. More on that later.
Connecting the camera
I bought Teltonika Rutx11 4G router/wifi modem that will fit in the camera junction box. Antennas will be outside:
I purchased an unlimited 4G plan from an ISP that has good connectivity in the area. Then connected the Rutx11 via tailscale/headscale. Using tailscale I can connect to the camera directly from both my NVR and all personal devices, a yet another tailscale+headscale recommendation.
I disabled outgoing connections from the camera on the router. As a nice side-effect, I have a really nice WiFi hotspot in the construction site.
Bandwidth and codec considerations
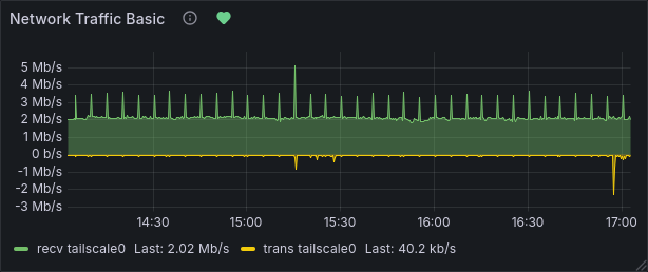
Two camera streams (2688x752 and 1920x1080), encoded in h.265 consume
around 2Mb/s 24/7. Both streams are transcoded to h.264 via go2rtc and then
sent over to Frigate and live view. Then recorded as H.264. Recordings for both
cameras take ~21-24GiB/day.
Every 5 minutes a separate process captures a full-resolution picture of both
cameras: 5376x1520 and 2560x1440. I have a bunch of timelapses already! If
we meet in person, I will happily show them.


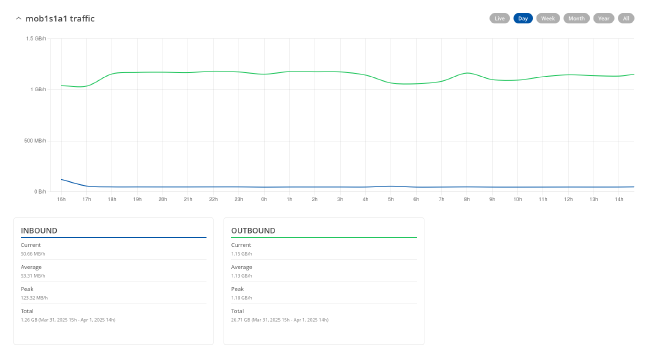
Using exactly the same parameters (resolution, fps), but with h.264, the bandwidth grows to 11 Mb/s. Which may not sound like a lot with today’s fiber everywhere, but is considerable on a 4G connection.
Since the home server has a graphics card, it can use hardware acceleration for video encoding and decoding. Thanks to proliferation of online video platforms, those decoders and encoders are available on even the cheapest hardware.
It takes ~5-10% of a single CPU core to transcode a stream, depending on the resolution. In my case, I am transcoding 4 streams (2 cameras, “low” and “high” res each), so in total transcoding uses about half of a core with minimal bandwidth.
Once the house is complete and I move NVR to the same physical network, I will change the encoding to h.264, stop transcoding and use more video bandwidth locally.
Final notes
With the current open-source NVR ecosystem and the price of consumer-grade surveilance cameras (low hundreds of €), I highly recommend setting one up if you are building something. It takes a few weeks to learn all the dusty corners, but, in my opinion, in the end it’s worth it.
-
Or vlc. Thanks to the French who make a point about not caring about royalties. ↩︎